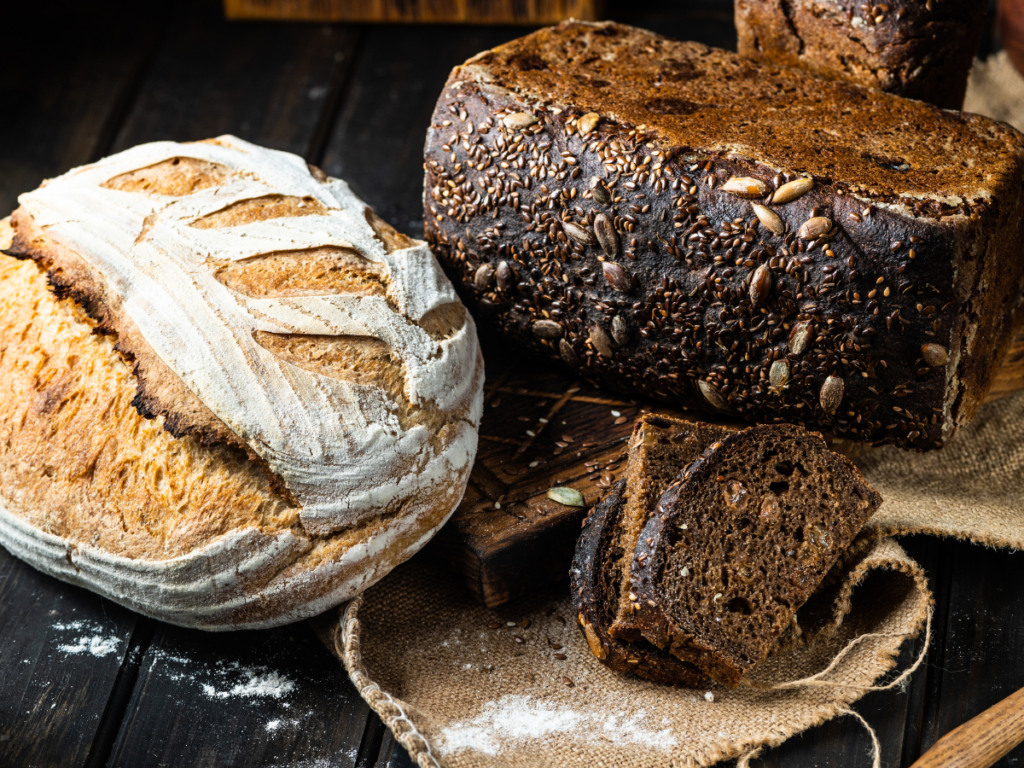
If you’re eager to bake delicious homemade bread but don’t have a sourdough starter, don’t worry. This “sourdough bread recipe without starter” will guide you through the process of making sourdough-like bread using commercial yeast and a few simple techniques to achieve that classic tangy flavor and chewy texture. Whether you’re a beginner or an experienced baker, this recipe offers a straightforward way to enjoy the taste and texture of sourdough without the need for a traditional starter.
The Charm of Sourdough Bread
Sourdough bread is beloved for its unique tangy flavor, chewy texture, and beautiful crust. This traditional bread has been enjoyed for centuries, and making it at home can be a deeply satisfying experience.
Why Make Sourdough Without a Starter?
Typically, sourdough bread requires a starter—a mixture of flour and water fermented with wild yeast and bacteria. However, making a starter from scratch can be time-consuming and requires careful maintenance. This recipe simplifies the process, allowing you to enjoy the delightful taste of sourdough bread without the need for a starter.
Health Benefits of Sourdough Bread
Sourdough bread offers several health benefits compared to regular bread:
- Easier Digestion: The fermentation process breaks down gluten, making it easier to digest.
- Nutrient-Rich: The lactic acid bacteria in sourdough increase the availability of nutrients like folate and antioxidants.
- Lower Glycemic Index: Sourdough bread can have a lower glycemic index, leading to slower sugar absorption and steadier blood sugar levels.
Overview of the Recipe
This sourdough bread recipe without a starter combines the traditional elements of sourdough with the convenience of modern techniques. By using a pre-ferment or “sponge,” you can achieve the same tangy flavor and texture without the lengthy process of maintaining a starter.
Ingredients and Equipment

Key Ingredients
To make sourdough bread without a starter, you’ll need the following ingredients:
- Flour: Bread flour is recommended for its higher protein content, which helps develop a good gluten structure. You can also use all-purpose flour or a combination of bread and whole wheat flour for added flavor and nutrition.
- Water: Water is essential for hydrating the flour and activating the yeast. Use filtered or bottled water if your tap water has a high chlorine content.
- Salt: Salt adds flavor and helps control the fermentation process.
- Yeast: Instant or active dry yeast is used to initiate fermentation in place of a traditional sourdough starter.
Flour Selection
The type of flour you choose can significantly affect the texture and flavor of your bread. Here are some options:
- Bread Flour: High in protein, bread flour gives your loaf a chewy texture and excellent structure.
- All-Purpose Flour: Versatile and widely available, all-purpose flour can be used alone or mixed with other flours.
- Whole Wheat Flour: Adds a nutty flavor and more nutrients to your bread. It can be combined with bread or all-purpose flour for best results.
Water Quality
The quality of the water used in your bread-making process is crucial. Here are a few tips:
- Filtered Water: Using filtered water can help avoid any unwanted chemicals, such as chlorine, that may inhibit yeast activity.
- Room Temperature: Water should be at room temperature to ensure proper yeast activation and fermentation.
Salt Types
Salt not only enhances the flavor of your bread but also strengthens the gluten structure. Here are some types you can use:
- Kosher Salt: A popular choice for its pure flavor and larger crystals.
- Sea Salt: Contains trace minerals that can add subtle flavor variations.
- Table Salt: If using table salt, reduce the amount slightly, as it is finer and denser than kosher or sea salt.
Having the right ingredients and understanding their roles will set the foundation for a successful sourdough bread-making experience.
Equipment Essentials

Mixing Bowls
Mixing bowls are essential for combining your ingredients and allowing the dough to rest and rise. You’ll need at least two large bowls: one for mixing and one for proofing. Glass, stainless steel, or plastic bowls work well.
Dough Scraper
A dough scraper is a versatile tool that helps in various stages of bread-making:
- Mixing: Assists in mixing the dough and scraping down the sides of the bowl.
- Shaping: Helps in handling and shaping the dough without tearing it.
- Cleaning: Makes it easier to clean up sticky dough residues from your work surface.
Proofing Basket
A proofing basket, also known as a banneton, supports the dough as it rises, giving it structure and shape. These baskets are typically made of wicker or plastic and are lined with linen cloth. If you don’t have a proofing basket, you can use a bowl lined with a clean kitchen towel dusted with flour.
Dutch Oven or Baking Stone
To achieve the perfect crust and crumb, you need to create a steamy baking environment. Here are two options:
- Dutch Oven: A heavy, lidded pot retains heat well and traps steam, creating an ideal baking environment for sourdough bread. Preheat the Dutch oven before placing the dough inside to ensure a crispy crust.
- Baking Stone: A baking stone helps distribute heat evenly and can also be used in conjunction with a steam pan to create steam in the oven. Preheat the stone before baking for the best results.
Having the right equipment will make your sourdough bread-making process smoother and more enjoyable, resulting in a delicious loaf with a perfect crust and texture.
Step-by-Step Recipe

Preparing the Dough
Mixing Ingredients
- Combine Dry Ingredients:
- In a large mixing bowl, combine 500 grams (about 4 cups) of bread flour, 10 grams (2 teaspoons) of salt, and 7 grams (2 teaspoons) of instant yeast.
- Add Water:
- Gradually add 350 grams (1.5 cups) of water, mixing with a dough scraper or your hands until a rough, shaggy dough forms.
Kneading Techniques
- Initial Mixing:
- Let the dough rest for 15-20 minutes. This process, known as autolyse, helps hydrate the flour and develop gluten.
- Kneading:
- Transfer the dough to a lightly floured surface. Knead by hand using the stretch and fold method: stretch the dough out, fold it over itself, and repeat.Knead for approximately 10 minutes until the dough turns smooth and elastic.
First Rise Process
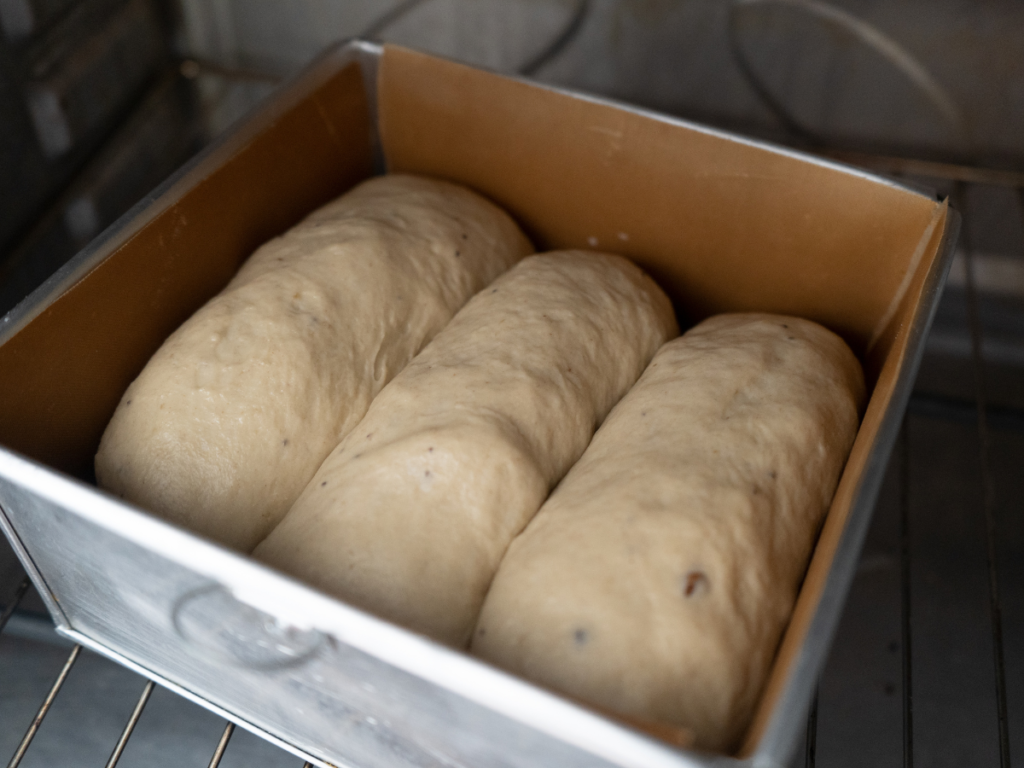
- Bulk Fermentation:
- Place the kneaded dough in a lightly oiled bowl, cover it with a damp cloth or plastic wrap, and let it rise at room temperature for 1-2 hours, or until it has doubled in size.
Shaping the Dough
Techniques for Shaping
- Pre-Shape:
- Turn the risen dough out onto a lightly floured surface. Gently deflate it and shape it into a rough round or oval, depending on your proofing basket or baking vessel.
- Rest:
- Let the pre-shaped dough rest for 10-15 minutes, covered with a damp cloth or plastic wrap. This rest period helps the gluten relax and makes the final shaping easier.
- Final Shape:
- After resting, shape the dough again into a tight ball or loaf. To do this, gently pull the edges of the dough towards the center, creating surface tension. Turn the dough over so the smooth side is on top and tuck the edges underneath, creating a taut surface.
Second Rise Tips
- Proofing:
- Place the shaped dough seam-side up in a floured proofing basket or a bowl lined with a floured kitchen towel.
- Cover:
- Cover the dough with a damp cloth or plastic wrap to prevent it from drying out.
- Second Rise:
- Allow the dough to rise for another 1-2 hours at room temperature, or until it has doubled in size. If your kitchen is warm, it might take less time; if it’s cool, it might take longer. Alternatively, you can refrigerate the dough overnight for a slow rise, which will develop more complex flavors.
- Readiness Test:
- To check if the dough is ready to bake, gently press a finger into it. If the indentation springs back slowly and partially, the dough is properly proofed. If it springs back quickly, it needs more time. If it doesn’t spring back at all, it may be over-proofed.
Following these shaping and rising techniques will ensure your dough is well-prepared for baking, resulting in a beautifully formed loaf with great texture and flavor.
Baking the Bread

Preheating the Oven
- Prepare for Baking:
- About 30 minutes before the end of the second rise, preheat your oven to 475°F (245°C).
- Preheat Baking Vessel:
- If using a Dutch oven, place it inside the oven to preheat as well. This ensures the pot is hot when you place the dough inside, helping to create a perfect crust.
Baking Times and Temperatures
- Transfer the Dough:
- Carefully transfer the risen dough to the preheated Dutch oven or onto a baking stone. If using a Dutch oven, score the top of the dough with a sharp knife or razor blade to allow for expansion.
- Initial Bake:
- Place the lid on and bake for 20 minutes. This traps steam inside, helping to create a beautiful crust.
- Remove Lid:
- After 20 minutes, take off the lid and continue baking for an additional 20-25 minutes. This allows the crust to develop a deep golden brown color.
Checking for Doneness
- Internal Temperature:
- The bread is done when the internal temperature reaches 200-210°F (93-99°C). Use an instant-read thermometer to check the temperature.
- Tap Test:
- Alternatively, tap the bottom of the loaf—it should sound hollow. This is another indication that the bread is fully baked.
- Cooling:
- Move the bread to a wire rack and let it cool thoroughly before slicing. Cooling allows the interior to set properly and enhances the flavor and texture.
Enjoy your freshly baked sourdough bread, perfect for sandwiches, toast, or simply enjoying on its own with a bit of butter!
Tips for Perfect Sourdough

Dough Consistency
- Proper Hydration:
- Aim for a dough that is somewhat sticky yet workable. It should maintain its shape while being soft and flexible. If the dough feels too dry, incorporate a small amount of water. If it’s too wet, sprinkle in a little more flour.
- Texture:
- After kneading, the dough should be smooth and elastic. Perform the “windowpane test”: stretch a small piece of dough thinly; if it forms a translucent membrane without tearing, it’s well-kneaded.
Hydration Levels
- Understanding Hydration:
- Hydration refers to the proportion of water to flour in your dough. Higher hydration doughs (75% or more) are more challenging to handle but yield a more open crumb and a chewier texture. Lower hydration doughs are easier to manage and produce a denser crumb.
- Adjusting Hydration:
- For a standard sourdough, aim for 70-75% hydration. This means for every 100 grams of flour, use 70-75 grams of water. Adjust based on the type of flour you’re using and your comfort level with handling wetter doughs.
Adjusting for Humidity
- Humidity Effects:
- Humidity can affect how much water your flour absorbs. In high humidity environments, you might need less water. In dry conditions, you might need more.
- Adjusting Ingredients:
- Start with the lower end of the recommended water amount and gradually add more if needed. Observe how the dough feels and adjust accordingly.
- Monitoring Dough:
- Pay attention to how your dough behaves during mixing and kneading. It should be soft and slightly tacky but not overly sticky. If it’s too sticky, add a bit more flour. If it feels dry or stiff, add a little more water.
By keeping an eye on dough consistency, adjusting hydration levels, and accounting for humidity, you can fine-tune your sourdough process to achieve the perfect loaf every time.
Flavor Enhancements
Adding Seeds and Grains
- Choosing Seeds and Grains:
- Popular choices include sunflower seeds, pumpkin seeds, sesame seeds, flaxseeds, chia seeds, rolled oats, quinoa, and millet. Each adds a unique texture and flavor to your bread.
- Preparation:
- Toasting seeds lightly before adding them to the dough can enhance their flavor. Larger grains like quinoa or millet should be cooked and cooled before incorporation to ensure they are tender.
- Incorporating into Dough:
- Add seeds and grains during the initial mixing stage. Start with about 1/4 to 1/2 cup of seeds or grains for every 500 grams of flour. Mix them evenly into the dough.
- Coating the Crust:
- Roll the shaped dough in a mix of seeds before the final rise to create a crusty, flavorful exterior.
Incorporating Herbs and Spices
- Choosing Herbs and Spices:
- Fresh or dried herbs like rosemary, thyme, oregano, basil, and sage, as well as spices such as garlic powder, onion powder, cumin, and coriander, can be used to add complexity to your bread.
- Preparation:
- Fresh herbs should be finely chopped. Dried herbs and spices can be used as-is.
- Incorporating into Dough:
- Add herbs and spices during the initial mixing stage. Use about 1-2 tablespoons of fresh herbs or 1-2 teaspoons of dried herbs and spices per 500 grams of flour. Adjust to taste.
- Flavor Pairings:
- Experiment with combinations like rosemary and garlic, thyme and onion, or cumin and coriander to create unique flavor profiles.
By adding seeds, grains, herbs, and spices, you can customize your sourdough bread to your taste, making each loaf a unique and flavorful creation.
Troubleshooting Common Issues
Dealing with Dense Bread
- Insufficient Kneading:
- Ensure you knead the dough adequately to develop the gluten structure. The dough should be smooth and elastic. If it doesn’t pass the “windowpane test” (stretching a small piece of dough into a thin membrane without tearing), knead a bit longer.
- Too Little Hydration:
- If your dough is too dry, it can result in a dense loaf. Ensure your hydration levels are correct (typically 70-75% for sourdough). Add water gradually and adjust as needed to achieve a slightly sticky, manageable dough.
- Improper Fermentation:
- Under-fermented dough can lead to dense bread. Ensure the dough rises to double its size during the initial fermentation. The environment should be warm enough (ideally around 75-78°F or 24-26°C) for optimal yeast activity.
- Overuse of Flour:
- Avoid using too much flour when shaping the dough. Excess flour can inhibit proper gluten formation and lead to a denser texture.
Preventing Overproofing
- Monitor Rise Times:
- Keep a close eye on the dough during its rising phases. Rising times can vary based on temperature and humidity. The dough should roughly double in size, and not more, during each rise.
- Finger Test:
- Test the dough by pressing a finger into it; if the indentation fills back slowly and partially, the dough is ready.
- Control Temperature:
- Maintain a consistent, moderate temperature during fermentation. Extreme temperatures can speed up or slow down the process unpredictably. A cool, slow rise in the refrigerator can help control fermentation and develop more flavor.
- Timing Adjustments:
- Adjust your timing based on the dough’s behavior rather than strictly following the clock. Pay attention to the dough’s texture and rise rather than adhering rigidly to prescribed times.
By understanding these common issues and their solutions, you can improve your sourdough baking process and achieve consistently better results.
Health Benefits of Sourdough
Nutritional Profile
Sourdough bread offers a unique nutritional profile compared to other types of bread due to its fermentation process. This traditional bread is often more digestible and nutrient-dense.
- Lower Glycemic Index:
- Sourdough has a lower glycemic index (GI) compared to regular bread. This means it causes a slower and more gradual rise in blood sugar levels, which can be beneficial for managing diabetes and preventing blood sugar spikes.
- Probiotics:
- The fermentation process in sourdough bread promotes the growth of beneficial bacteria (probiotics). Although many of these probiotics are destroyed during baking, the prebiotics formed during fermentation can support gut health.
Vitamins and Minerals
- Increased Nutrient Bioavailability:
- The lactic acid bacteria in sourdough improve the bioavailability of minerals like magnesium, iron, and zinc. The fermentation process helps break down phytic acid, an antinutrient found in grains that can inhibit mineral absorption.
- B Vitamins:
- Sourdough bread is a good source of B vitamins, including folate (B9) and thiamine (B1). These vitamins are essential for energy production, brain function, and cell metabolism.
- Vitamin E:
- Some varieties of sourdough, particularly those made with whole grain flours, contain higher levels of vitamin E, an antioxidant that supports immune function and skin health.
Fiber Content
- Dietary Fiber:
- Sourdough bread, especially when made with whole grain flours, is a good source of dietary fiber. Fiber aids in digestion, helps maintain bowel health, and can lower cholesterol levels.
- Prebiotic Fiber:
- The fermentation process produces prebiotic fibers, which serve as food for beneficial gut bacteria. These prebiotics can improve gut health and contribute to a balanced microbiome.
By incorporating sourdough bread into your diet, you can enjoy a range of health benefits, from improved nutrient absorption to better digestive health.
Digestive Benefits
Lower Phytate Levels
- Reduction of Phytic Acid:
- Phytic acid, found in many grains, can bind to minerals like iron, zinc, and calcium, making them less available for absorption in the body. The fermentation process in sourdough bread significantly reduces the levels of phytic acid. This breakdown of phytic acid enhances the bioavailability of these essential minerals, allowing your body to absorb more nutrients from the bread.
- Enhanced Mineral Absorption:
- With lower phytate levels, the absorption of important minerals is improved. This can contribute to better overall health, as minerals play crucial roles in various bodily functions, including bone health, oxygen transport, and immune system support.
Improved Digestion
- Easier Gluten Breakdown:
- The natural fermentation process in sourdough bread partially breaks down gluten, the protein that can cause digestive issues for some people. This makes sourdough easier to digest than traditional yeast-leavened bread. People with mild gluten sensitivities often find that they can tolerate sourdough bread better.
- Probiotic Effects:
- While the baking process kills most of the live probiotics in the dough, the fermentation process still creates beneficial prebiotics that promote gut health. These prebiotics help nourish the good bacteria in your gut, supporting a healthy digestive system.
- Reduced Bloating:
- Many people report less bloating and digestive discomfort when eating sourdough bread compared to other types of bread. The fermentation process helps break down complex carbohydrates, making them easier for your body to process.
- Beneficial Acids:
- Sourdough fermentation produces lactic acid and acetic acid, which can help slow down the rate at which glucose enters the bloodstream. This not only aids in better blood sugar control but also contributes to a longer feeling of fullness, aiding in weight management.
Incorporating sourdough bread into your diet can provide significant digestive benefits, making it a more digestible and nutrient-rich option compared to conventional bread.
Conclusion
Recap of Key Points
- The Charm of Sourdough:
- Sourdough bread is celebrated for its unique tangy flavor, chewy texture, and beautiful crust, offering a satisfying baking experience.
- No Starter Needed:
- This recipe allows you to make delicious sourdough bread without the need for a traditional starter, simplifying the process while still delivering great results.
- Health Benefits:
- Sourdough bread offers numerous health benefits, including easier digestion, lower glycemic index, and enhanced nutrient absorption due to the fermentation process.
- Flavor Enhancements:
- You can customize your sourdough with seeds, grains, herbs, and spices to create unique and flavorful variations.
- Troubleshooting Tips:
- Understanding common issues like dense bread and overproofing can help you achieve the perfect loaf.
Encouragement to Try the Recipe
Baking sourdough bread at home can be a rewarding and enjoyable experience. With this simplified recipe, you can skip the lengthy process of maintaining a starter and still enjoy the delightful taste and health benefits of homemade sourdough. Whether you are new to bread-making or an experienced baker, this recipe is designed to guide you through each step with ease.
Final Thoughts
Sourdough bread is more than just a food; it’s a connection to centuries-old baking traditions and a way to bring wholesome, nutritious bread to your table. By following this recipe, you can create a loaf that is not only delicious but also beneficial for your health. So gather your ingredients, preheat your oven, and embark on your sourdough baking journey. Enjoy the process and savor the results!
FAQ’s
What Can I Use If I Don’t Have a Sourdough Starter?
If you don’t have a sourdough starter, you can still make delicious sourdough-like bread by using commercial yeast and other techniques to mimic the flavor and texture of traditional sourdough.
Is Sourdough Starter Necessary?
A sourdough starter is not strictly necessary to make sourdough-like bread. While a traditional sourdough starter contributes to the unique flavor and fermentation process of sourdough bread, you can achieve similar results using alternative methods.
What Can You Use Instead of Starter in Bread?
- Commercial Yeast:
- Instant Yeast: Easy to use and doesn’t require proofing. Simply mix it directly with your dry ingredients.
- Active Dry Yeast: Must be dissolved in water before incorporating into the dough. Provides good rise and texture.
- Poolish or Biga:
- These are types of pre-ferments that use commercial yeast. They add flavor and improve the texture of the bread.
- Poolish: Mix equal parts flour and water with a small amount of yeast and let it ferment for several hours or overnight.
- Biga: Similar to poolish but with a lower hydration level, resulting in a stiffer dough.
- Yogurt and Buttermilk:
- Adding a small amount of yogurt or buttermilk to your dough can introduce lactic acid bacteria, similar to those found in a sourdough starter, enhancing the flavor.
Can Yeast Replace Sourdough Starter?
Yes, you can use yeast instead of a sourdough starter. Here’s how you can adapt your recipe:
- Yeast Quantity:
- Use about 1-2 teaspoons of instant or active dry yeast for a standard loaf. This will provide sufficient rise and fermentation.
- Flavor Development:
- To mimic the tangy flavor of sourdough, let the dough ferment for a longer period at a cooler temperature. You can also add a small amount of vinegar or lemon juice to the dough.
- Hydration and Texture:
- Follow the same hydration levels as a sourdough recipe, typically around 70-75%, to achieve a similar texture.
By using these methods, you can create a bread that has the qualities of sourdough without the need for a traditional starter.
Sourdough Bread Recipe Without Starter
Creating a sourdough bread recipe without a starter can be a unique challenge, but with the right approach and knowledge, it’s entirely possible. To enhance your recipe and provide valuable resources for your readers, consider these internal linking opportunities based on the sitemap content from Purely Recipes.
Key Ingredients and Preparation
- Gluten-Free Sourdough Bread Recipe: This link can provide alternative gluten-free methods that might be useful for those with dietary restrictions.
- What is the Best Gluten-Free Flour to Use for Sourdough Starter: This article will help readers understand the best flour choices for creating a starter-free sourdough.
Baking Techniques
- Why Won’t My Gluten-Free Sourdough Bread Rise: A useful resource for troubleshooting common baking issues.
- How to Make Sourdough Sandwich Bread Less Dense: Tips on achieving the perfect texture in your sourdough bread.
Health and Nutritional Information
- Is Sourdough Bread OK If You Are Gluten-Free: Information on the health benefits and considerations of consuming sourdough bread.
- Why is Sourdough Bread Not Fattening: Insights into the nutritional profile of sourdough bread.
Advanced Baking Insights
- Sourdough Rye Bread Recipe: For those interested in exploring different types of sourdough.
- What is the Difference Between Rye Sourdough and Regular Sourdough: Educational content on the variations within sourdough bread types.
